You need to establish an account for yourself as a developer to make your app available for sale by Apple’s guidelines. Apple Developer is a software that allows you to upload your apps on Apple’s App Store. It is a step-by-step guide to setting up your iOS Developer account.
It’s a point to note, that with Apple’s recent changes to its app review guidelines, apps must be submitted directly by the provider of the app’s content using their Apple developer account. Apple will likely reject the app if the app and developer account don’t match.
According to Apple, here’s what you need before you enroll:
Enrolling as an Individual
If you’re an individual or you own a business, you’ll need to provide basic personal information, including your legal name and address, to sign in to your Apple ID.
Enrolling as an Organization
If you’re enrolling in your company, you’ll need an Apple ID as well as the following:
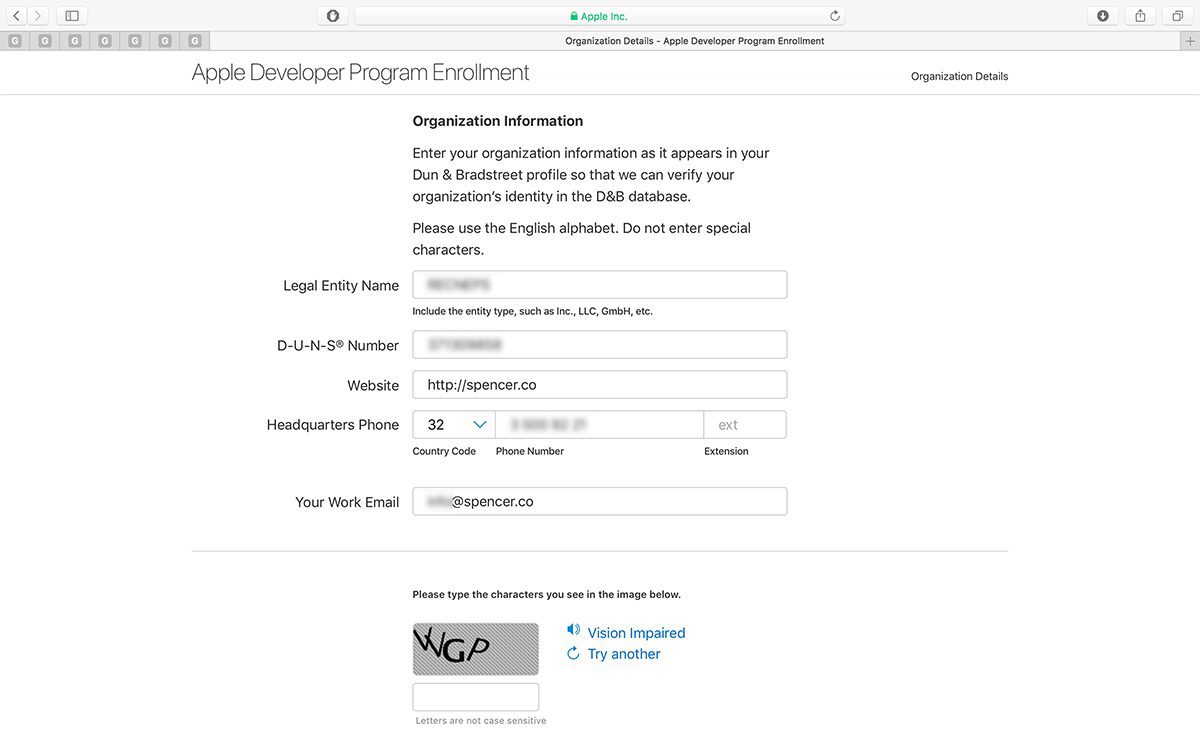
A D-U-N-S® Number
Your company must be registered with a D-U N-S number in order us can confirm your identity and legal status as a company. The unique nine-digit number is issued through Dun & Bradstreet and is commonly used as a standard business identification code. You can check to see if your company already has a D-U-N-S Number and request one if required. They are free in most jurisdictions.
Legal Entity Status
Your organization must be a legal entity to agree with Apple. We do not accept DBAs, fictitious businesses, trade names, or branches.
Legal Binding Authority
As the person you enroll your organization under the Apple Developer Program, you must have the legal right to bind your organization to legal agreements.
You must be the owner/founder of your company or know about a senior project or any legal authority assigned to you by a senior employee.
Creating an iOS Developer account
Step 1: Create Apple ID
An Apple ID is a prerequisite for creating an iOS developer account. If you don’t already have one, you can create an Apple ID by following the steps listed below.
- Go to Apple Developer Account and click on Account
- Proceed to Create Apple ID and enter the details
- Enter and save details like First & Last Name, Country, Birthday, Email ID, Password
- Address the security queries and finish creating your Apple ID
Step 2: Set up two-factor authentication
In the next step, we have to set up two-factor authentication. We recommend using an Apple device to set up two-factor authentication because it becomes simpler.
If you have an iPhone or iPad, do the following:
If you have an iPhone or iPad, do the following:
- Go to Settings and click on your username at the top
- Click on Password and Security
- Tap on Two-Factor Authentication
- Turn it ON
If you are using an Apple Computer, then do the following:
- Open Apple Menu
- Select System Preferences
- Open iCloud
- Open Account Details
- Click on Security
- Tap on Two-Factor Authentication
- Turn it ON
However, if you don’t have an Apple device, you can also contact Apple’s support team and get their help to set up two-factor authentication.
You proceed to sign in to your account using your Apple ID and password to complete the rest of the process.
Step 3: Join the Apple Developer Program
When you’re signed in, you’ll see a display that says “Join the Apple Developer Program.” Complete the process for the same by following the steps given below:
- Click on Join the Apple Developer Program
- Read through the information and Submit
- Pick your Account Type
Above we have already described the accounts, based on which you can select your account type.
1: Individual
2: Organization
Step 4: Enter profile details
Next to this, you will now need to enter basic information about yourself and your business. It is as follows:
- Verify your email address
- Enter Name
- Enter Country Location
- Select Account or Entity Type (as described above)
- Click on Start Your Enrollment to finish the process
Note: Treat each step as a professional requirement and enter only authentic and relevant information to avoid any kind of problem in the future.
Step 5: Enter contact details
The next step is to enter contact information and sign up for the agreement. Its process is as follows:
- Go to the Your Information page and input information as directed
- Enter your Legal Name and Phone Number
- Enter Business Address with Postal Code
- Read through the Apple Developer Program License Agreement
- Check the box and click on Continue
Step 6: Verify account information
You will then be redirected to a page where you will have to verify your account details. Once you are ready, click on continue and proceed to the next step.
Step 7: Purchase automatic renewal (optional)
The Apple Developer Program is not a one-time purchase. To continue your enrollment, you must renew your membership annually.
And if you opt for the auto-renewal option then you can do it under this section. As you will be redirected to the automatic renewal page, you can read the terms of subscription and renewal.
After reading, you can check the box and proceed by clicking on Continue to finish the process. You can also choose not to activate auto-renewal or stop the process at any time by modifying the settings in your account.
Step 8: Sign in with Apple ID
Once you have done the account verification and renewal process, you will be redirected to the account sign-up page.
Now sign in to your account with your Apple ID and password.
Step 9: Enter billing information and make payment
Now after you have entered the information, you will be redirected to the Billing and Payment page. Here, you have to do this process.
- Enter Billing Contact
- Enter Billing Address
- Set up Payment Method (Debit Card, Credit Card or PayPal)
- View the order total and Continue to confirm and make the payment
Enter the required information in the following pages and finish the developer account creation process. Wait for a confirmation email from Apple regarding successful account creation (usually arrives within 24 hours).
Step 10: Proceed to list your fully built app
Finally, now, your enrollment process is complete. Proceed to add your fully built app to the App Store using your Developer Account. You can go to your App Store Connect account and file an App Store listing under the My Apps section.
Conclusion
I hope now you have learned how to create an iOS developer account with the help of this article. If you are a company and you have to make an app related to your business for both ios and Android platforms that too in a concise time, then in this situation, you can choose Flutter software development. And for that, you can contact Appic Softwares.